Upload a Custom PowerPoint Template
Upload a custom template as the default for Microsoft PowerPoint exports. This template must be a PPT file.
Overview
Custom PowerPoint templates allow the customer to download content in their desired slide structure. For example, the customer might want each analysis title to be size 36 font. A custom PowerPoint template ensures this need is met. Each tenant can use one custom template at a time.
Note: If an analytic tenant does not have a custom PowerPoint template uploaded, it will inherit the administrating tenant's template.
Step One: Test a custom template
Before uploading, test that content will export in the expected template structure.
- In a project, click Preview Solution
 on the navigation bar.
 - In the preview version of the solution, go to the Analyses room.
- Open an analysis that you own.
- Click the Download button
 > Download full analysis as custom PowerPoint.
 - Click Browse and select your custom PowerPoint template.
- Click Open > Upload File.
Result: The export may take a few minutes to process. The analysis will download automatically as a PPT file.
Step Two: Upload a custom template
Warning: This workflow overwrites the previous PPT template file. You cannot roll back to a previous version.
To upload a custom PowerPoint template:
- On the global navigation bar, click Settings > PowerPoint template upload.
- Click Choose File.
- Select a PPT file and click OK > Upload.
Result: The uploaded PowerPoint template will be used whenever a user exports content as a Microsoft PowerPoint.
Template options
In a template, you have options to customize the slide layout and add additional display settings to the slide master.
Slide layout
You can customize the layout and formatting of the Analysis Title and Business Question slides. Each slide matches a slide type in presentation mode.
Note:
- These slides are not required. If the slides are not included in the custom template, the export will use the default layout (how it appears in presentation mode).
- You cannot customize the layout of the visualization slide. However, users will be able to edit the visual and text elements (analysis context, and Info panel) of the slide when they export the analysis.
When creating these slides in the template:
- Delete all title slides: Title slides are not supported, insert a blank slide when you add a new slide to the template.
- Delete all content placeholders: Content must be added using text boxes.
- Custom templates must use the widescreen 16:9 aspect ratio: To ensure your template is set to the 16:9 aspect ratio, click Slide Size on the Design tab.
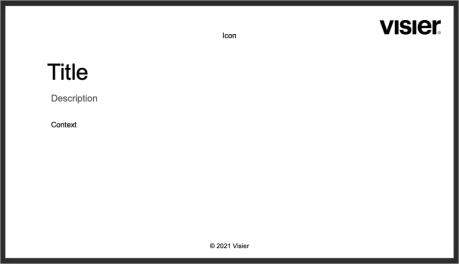
Slide One: Analysis Title
This slide contains:
- Analysis title: Add a text box that reads Title.
- Analysis description: Add a text box that reads Description.
- Analysis context: Add a text box that reads Context.
- Topic icon: Add a text box that reads Icon. Adjust the dimensions of the text box to match the desired icon size.
Slide Two: Business question
Customize how analysis headers will appear in the export using the Business Question slide. Related content inside an analysis are grouped together under headers. Headers are typically written in the form of a business question that users may have. For example, Are high performers leaving the organization?
This slide contains:
- Business question: Add a text box that reads Title.

Additional display settings
Company logos, images, and footer information can be added to the slide master.
Tip: We recommend that you manually recreate any custom templates provided by the customer. This is typically easier than trying to force a customer-provided template into our expected formatting. The whole process should take less than 15 minutes.
Open the slide master
- Click Slide Master on the View tab.

Add images or company logo
- Click Pictures on the Insert tab.


Add a footer
Use the footer to add a privacy statement and other disclaimers.
Note: Text must be added through the footer. Text boxes in the slide master are not supported. Content added through text boxes in the slide master will not appear.
- To add the footer placeholder to the master slide, click Master Layout > Footers.

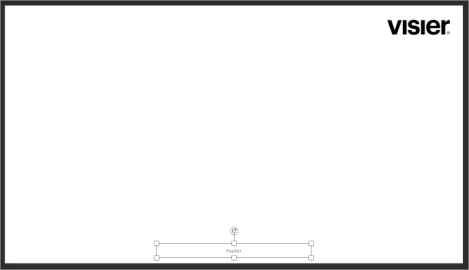
- Insert your content in the footer.
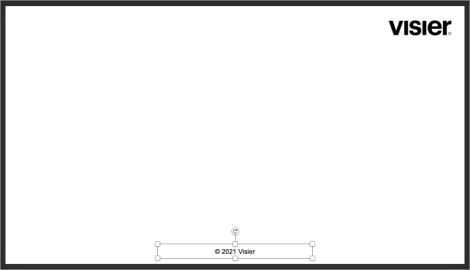
- Format the text in the Home tab.
- Apply the footer to all slides in Slide Master view:
- Click Header and Footer on the Insert tab.

- In the Header and Footer dialog, select the footer and click Apply to All.
- Click Header and Footer on the Insert tab.
Frequently asked questions
Can I add page numbers to my template?
No. Page numbers are automatically appended to the download. You cannot customize how page numbers will appear.
Can I bold, italicize, or underline text?
This is a known limitation. Don't use bold, italic, or underline in your text boxes, as it won't work and will set your text color to black.
What shapes can I add to my template?
You can add images, solid lines, and rectangles with solid fills and border lines. Rectangles with rounded corners are not supported.
Can I add text in the slide master?
No. Text boxes in the slide master are not supported. If you want to add a privacy statement and other disclaimers to the template, you must add a footer in the slide master.
Can I use transparencies?
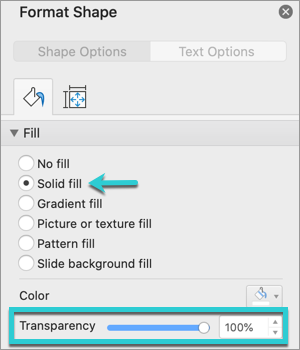
The default "No fill" on text boxes doesn't work well with the PowerPoint template feature. Try the following:
- Right-click the text box and select Format Shape.
- Click Solid fill.
- Set the Transparency to 100%.
Can I use gradients?
No. Gradient fills don't work with the PowerPoint template feature. We will automatically generate a solid color based on the selected gradient colors. Use a solid fill instead.
Can I use dashed lines?
No. Dashed lines don't work with the PowerPoint template feature. Use solid lines instead.
